Hi, I'm Alex with Two Scoop Games - today's Two Scoop Update is all about this -
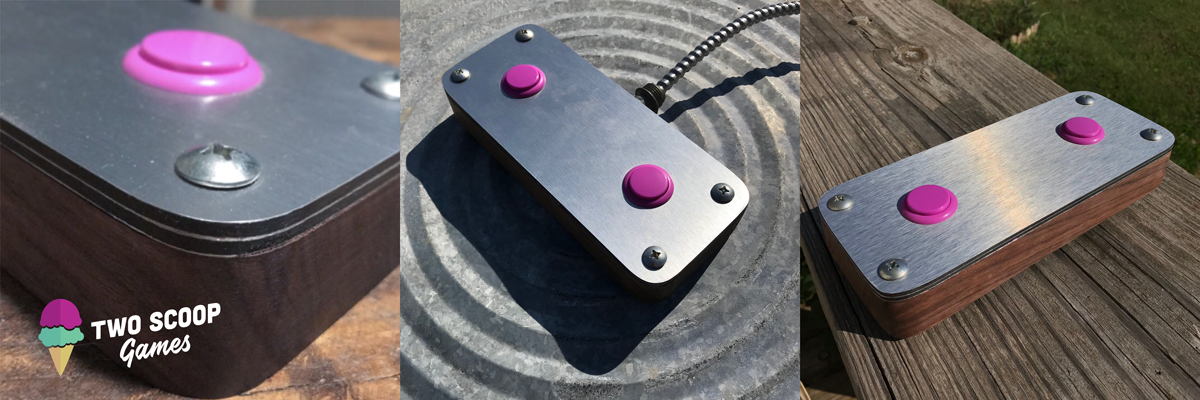
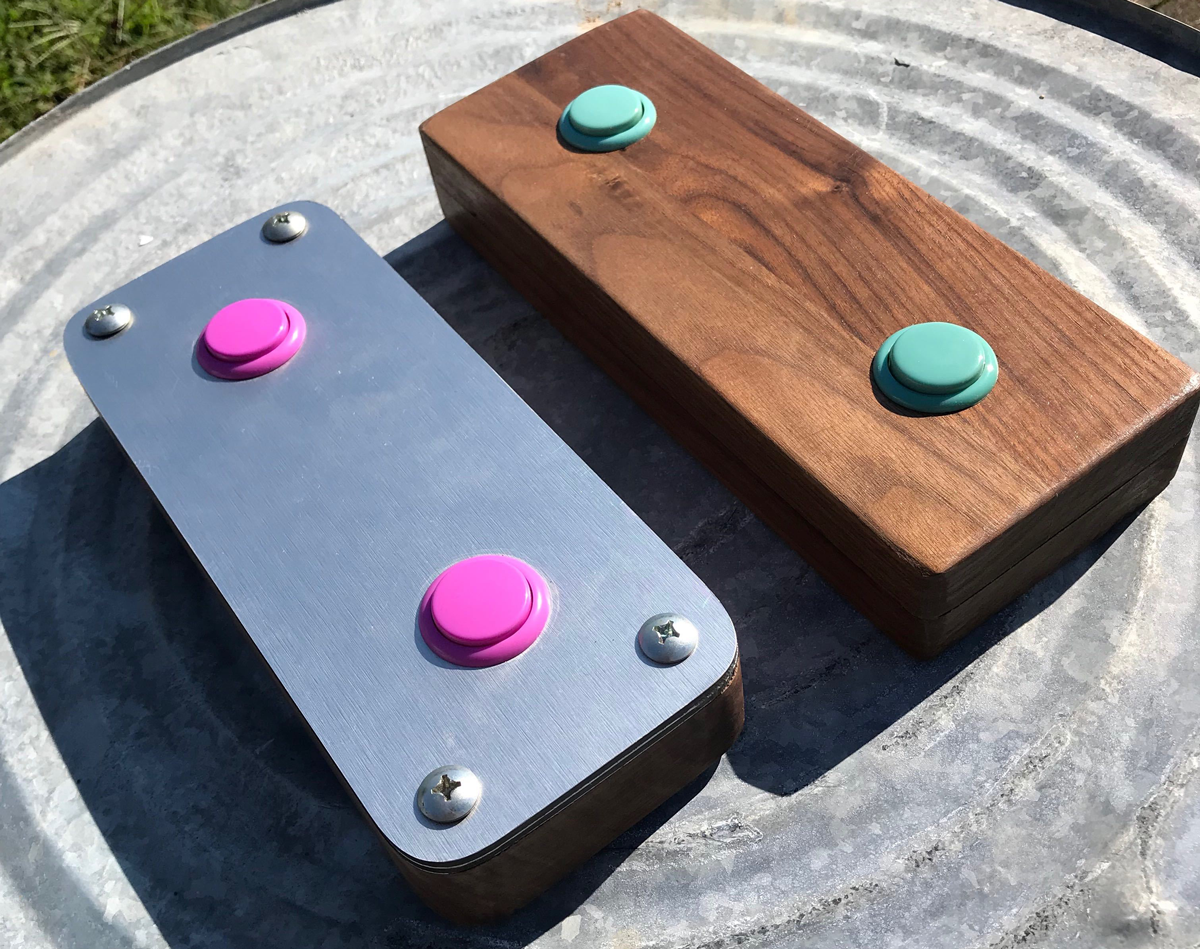
The Kick Bot Controller.
When we take the Kick Bot Controller to shows we usually get a lot of questions about what the Kick Bot Controller is and where it came from.
Kick Bot is a game that you play with only two buttons so the Kick Bot Controller is a controller that only has two buttons.
 We built the controller ourselves out of a block of wood, some arcade buttons, and a tiny computer called the Arduino Pro Micro that you can attach wires to for buttons and other accessories. After putting a little bit of code on the Arduino it now emulates the right and left arrow keys on the keyboard.
The reason for the Kick Bot Controller is simple: when we bring our game to shows we want people to look at something with two buttons, instead of a keyboard. A regular keyboard has over a hundred keys on it and our game only uses two of them. Having a custom controller makes our game more accessible, friendly, and inviting. Don't know how to play? Well you really can't go wrong just try pressing the buttons and see what happens.
I really recommend this project if you are a game developer who's going to show their games at conferences and expos, or if you're just somebody who wants to make a really cool controller to play the games that you love to play!
On to the tutorial!
We have created a tutorial for getting started creating your own custom arcade controller. This guide is by no means exhaustive, there are infinite configurations from those where you pound rubber fish, to controllers with 100 buttons! But the principle is the same, you need to get input from some form of buttons into your computer and the easiest way we have found to do that is by using a small microcontroller that emulates a keyboard.
Pre-reqs
This tutorial assumes you have some basic electronics knowledge but we will try to keep things really simple. If you don’t know how to solder, check out this video: Basic Skills!: Basic Soldering
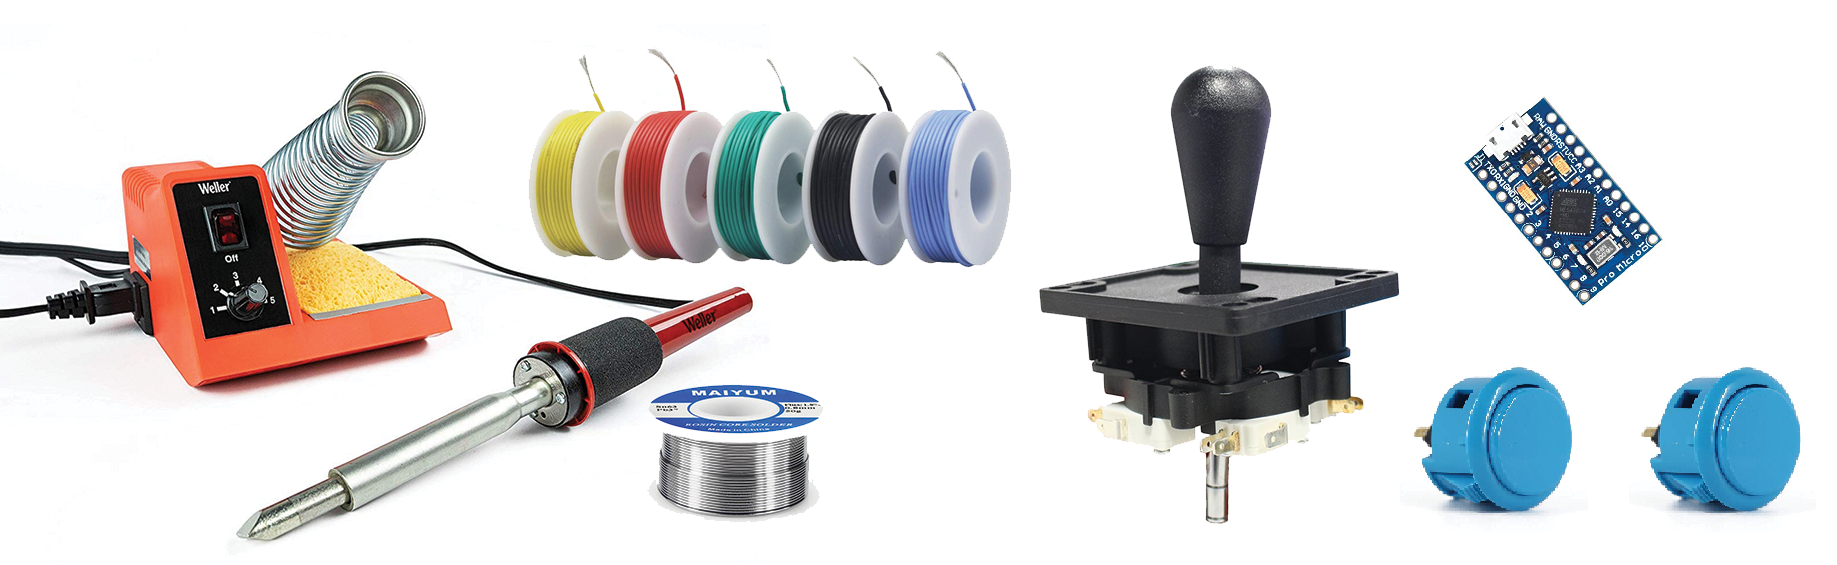
What you need:
Computer – Anything with a USB port and access to the internet will work
Arduino – Super tiny computer meant for hobby projects, and for prototyping electronics
- Arduino Pro Micro (clone)– Super tiny, but will likely require soldering (This tutorial is based on the Pro Micro)
- Arduino Leonardo – Not as small as the Pro Micro, but it has pin receptacles that will make it easier to use for beginners (pin numbers in this tutorial are for the Pro Micro NOT the Leonardo, you will need to use different pins)
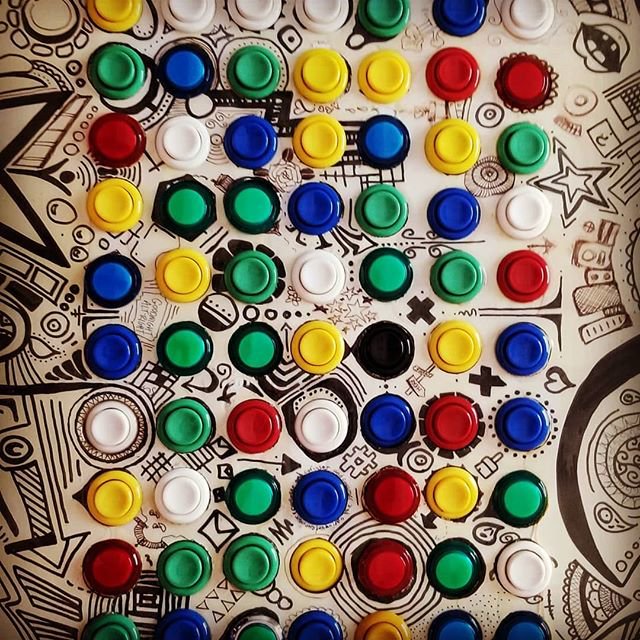
- Arcade Buttons – Simple switches that come in a variety of sizes and colors, these are a ton of fun to pick out
Arcade Joystick – A simple method of directional control
Soldering Iron – For making connections
Solder – Who doesn't like melting metal?
Wire – (18 or 20 Gauge recommended) Needed to go between the Arduino and the buttons and joysticks. Choose two different colors, one for ground and one for signal, OR if you want to make it really easy on yourself black for ground, and a different color for each button's signal.
USB micro (male) to USB A (male) cable
- USB A – The standard USB port that most keyboards use
- USB Micro – The smaller USB port that devices like older android phones use (the Arduino Pro Micro and Leonardo use this as well)
Optional but recommended!
- Alligator Clips – Great alternative to soldering for when you are testing things out
- Helping Hands – This is a device with a magnifying glass and little clippy hands to help you hold things while soldering. Here's an extra fancy one we wish we had
- Solder Sucker – This thing is amazing if you mess up or just need to remove solder from something.
- Soldering iron tip cleaner – Gotta stay clean!
- Wire Strippers – These are the best wire strippers, they are super fun to use.
First step – planning
Figure out what type of controller you want to create. We recommend to start simple with just one button wired up using alligator clamps as a temporary method of connecting everything. You can get more complex later, but getting one button hooked up to your computer and fully working to send a key press will feel really good, and encourage you to continue to more complex, cooler designs.
Buttons, how do they work?
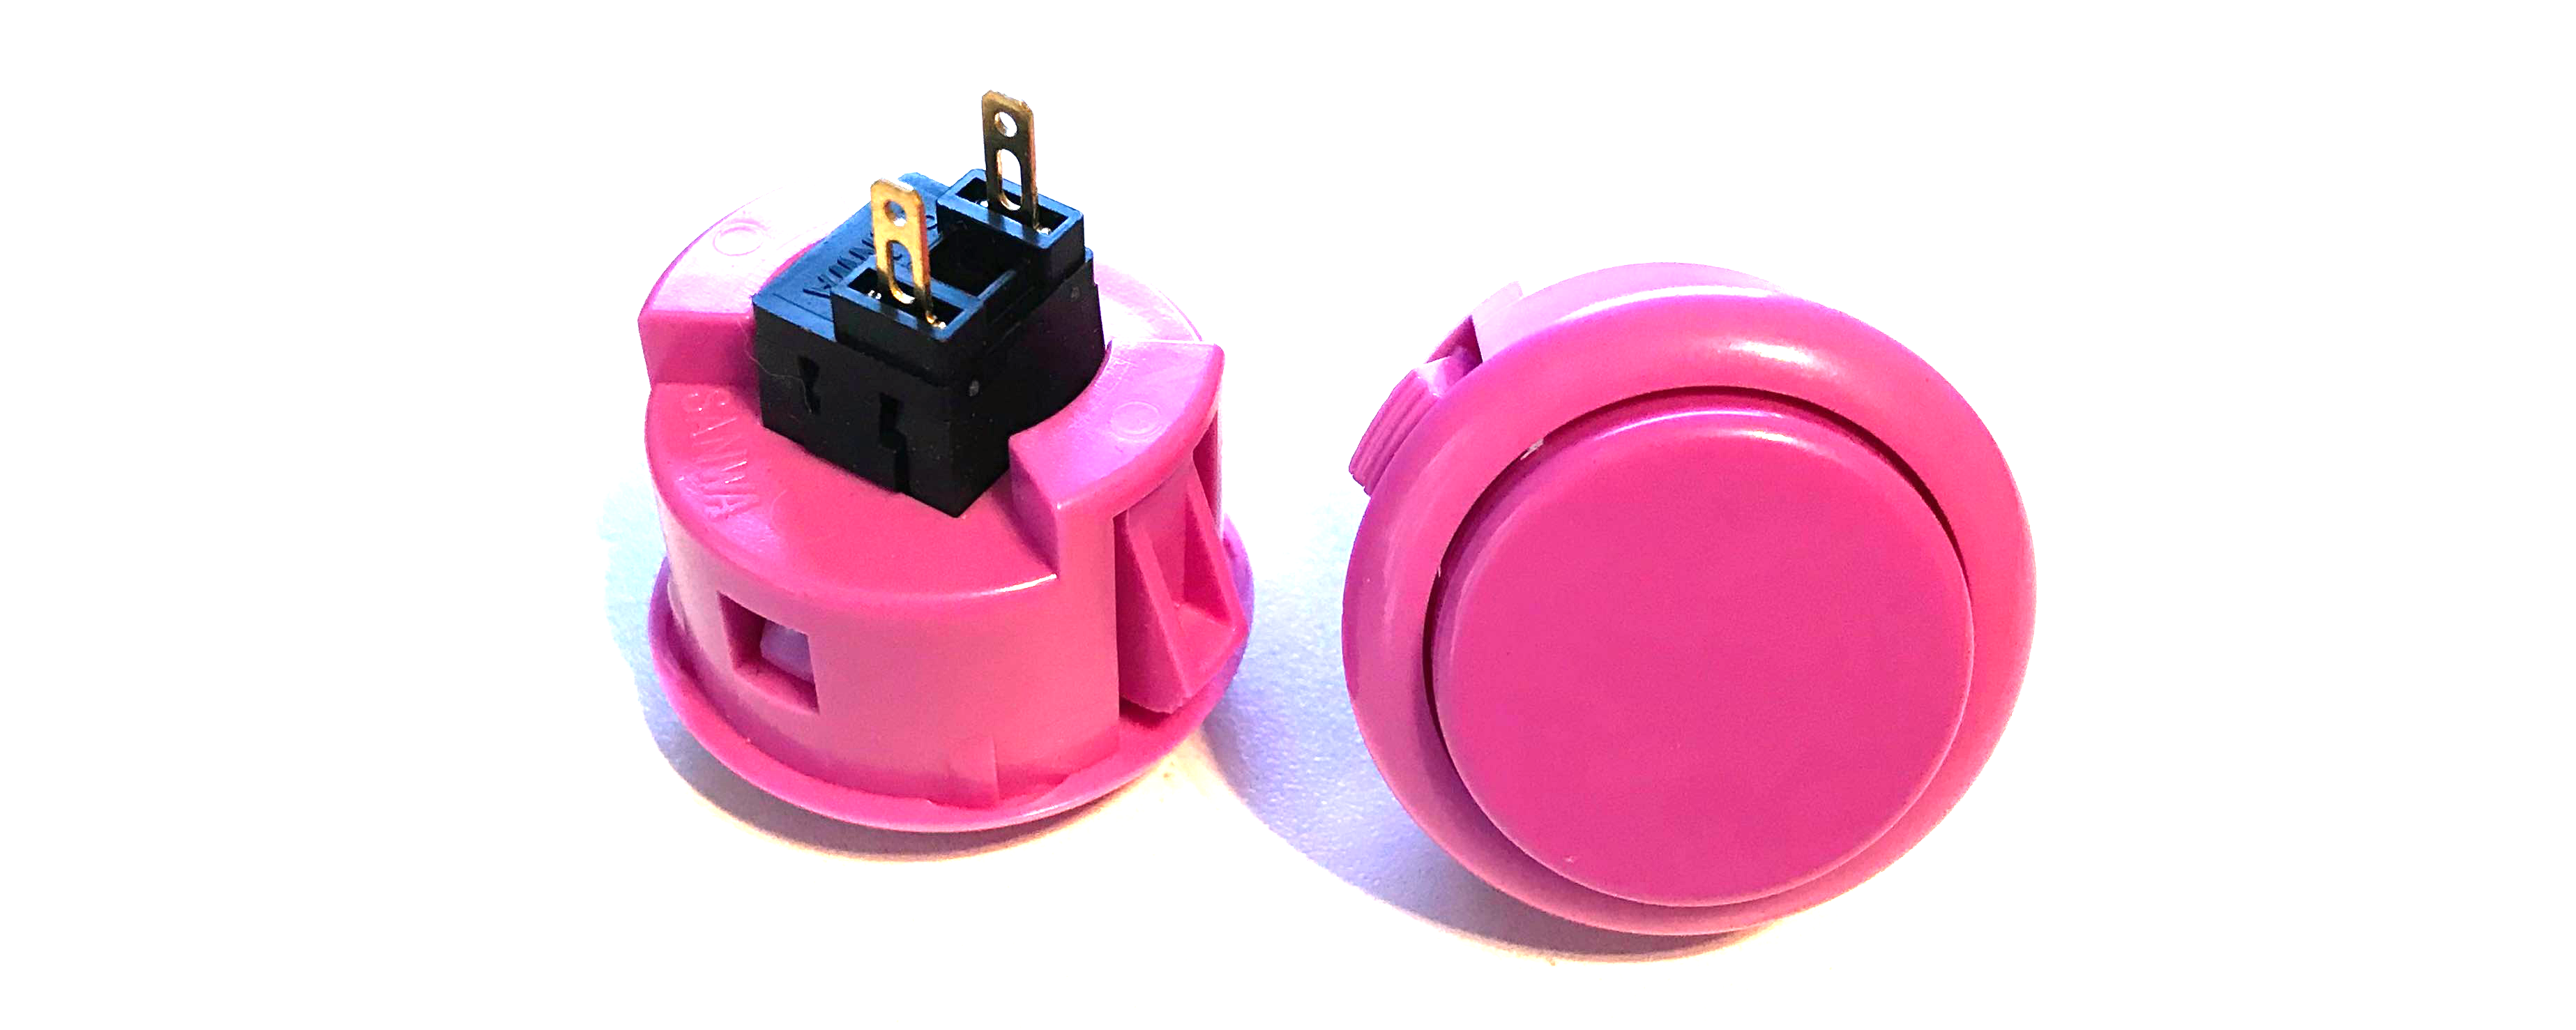
Two wires, ground and signal. You will notice that on the bottom of arcade buttons there are usually two (on the Japanese-style Sanwa buttons we are using) or three (on the larger American style arcade buttons) metal posts. The basic principle to follow is that one post is for ground (which can be shared by all buttons) and the other is to send a signal to the Arduino.
Joysticks, how do they work?
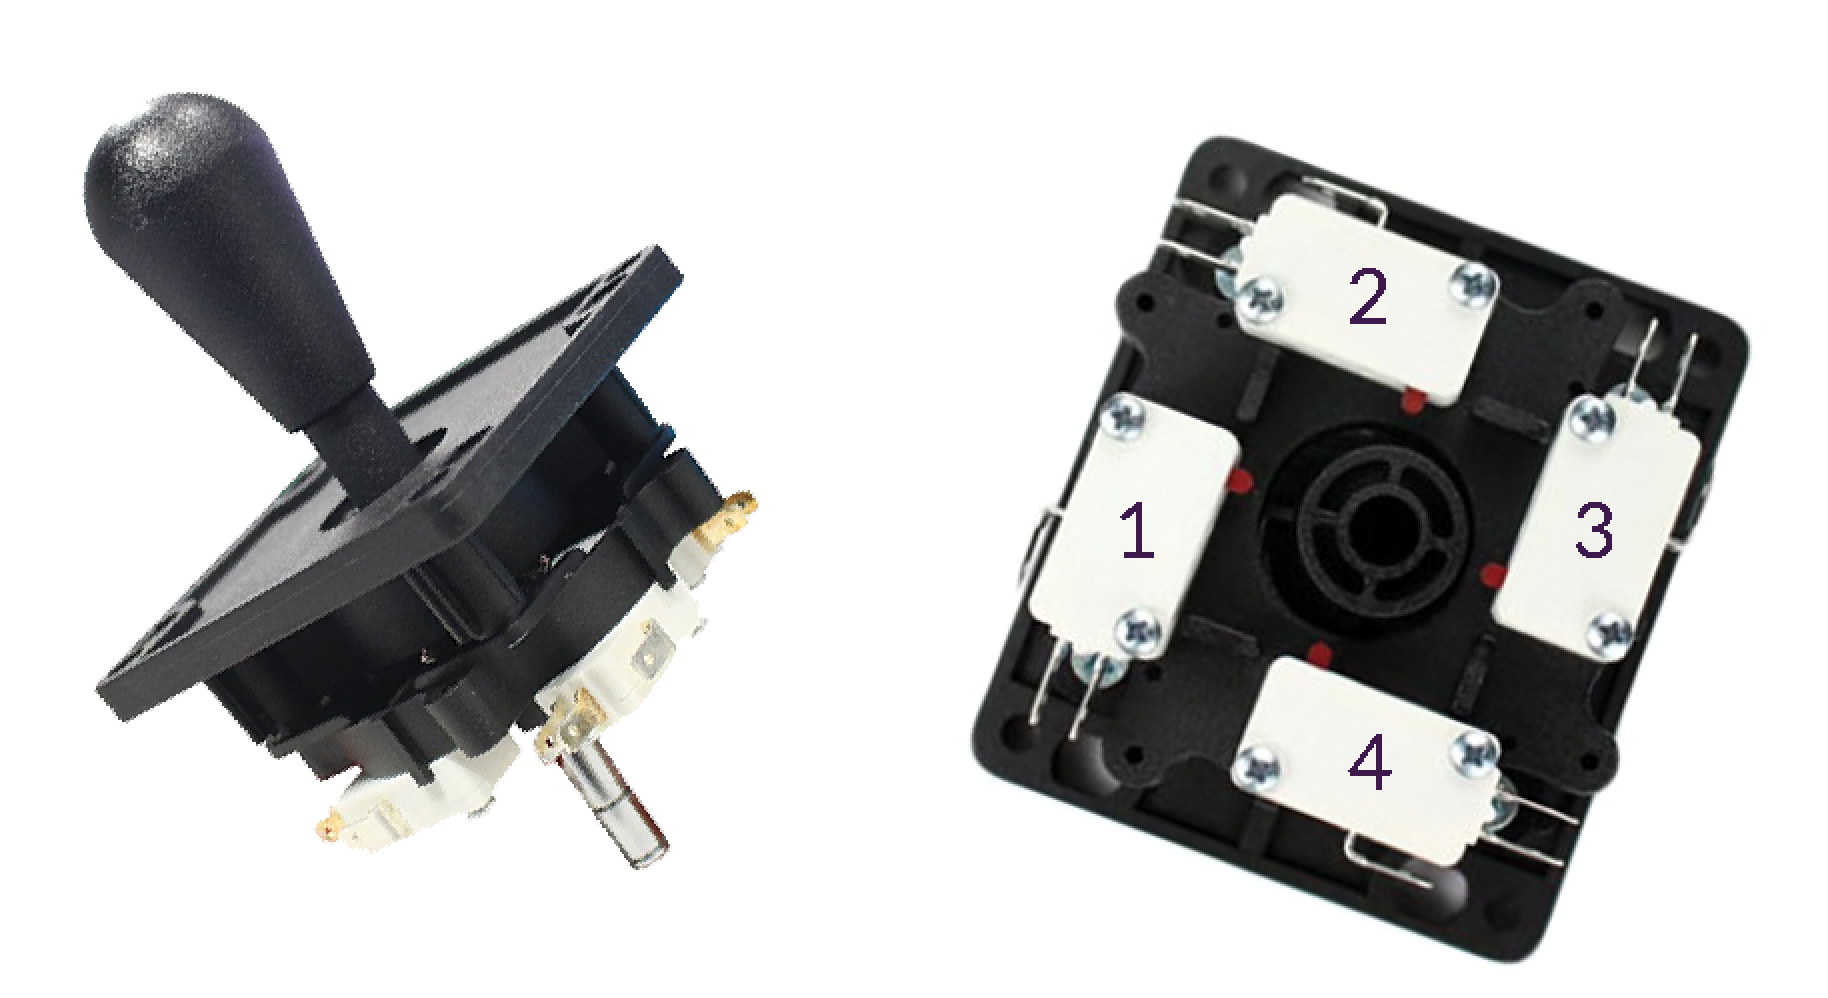
A four-directional joystick is basically four switches, each one needs to be connected like an individual button. Arcade joysticks are not like the analog ones we are used to on console controllers. Most arcade joysticks are more like D-Pads with only four directions. This means they function much the same as arcade buttons and only require one wire per direction to send signal and one wire for each switch needs to go to ground, making eight wires total.
The basic layout
The Arduino Pro Micro has 10 pins you can use, the markings can be a little confusing, but if you start adding wires on the opposite side of the USB port you are pretty safe. For our example we will talk about making an arcade controller with a joystick and two buttons. This will require 12 total wires; eight for the joystick, and two for each button. The signal wires you will use will take up six pins on the Arduino, and we will use pins 9 and 8 for the buttons, and 10, 16, 15, and 14 for the joystick since they are easy to access on the opposite side of the USB port. We will also need six ground wires to form a chain that the joystick and both buttons share to get to one of the GND pins on the Arduino.
One button to start out
Your wire lengths may vary depending on where the buttons will be in your controller in relation to the Arduino, but for our purposes in this tutorial we will suggest around eight inches (you can always shorten them later during cleanup).
- Cut two 8" lengths of your signal and ground colored wires.
- Strip all wire ends about 3/4 inch.
- Attach both wires to your first arcade button via solder or alligator clips.
- Loop the ground wire through one of the GND pins on the Arduino, and the signal wire through pin 9. (We are looping the wire through instead of soldering incase we want to move them later.)
Now we are ready to hook up the Arduino to your computer via USB. Once connected, the red power indicator light on the Arduino will turn on, but nothing will happen until we add code to the Arduino to tell it what to do.
The code
The next step will be to get the code onto the Arduino. This code is written to work for two buttons and a joystick, even though you only have one button connected, it should still work for that one button since nothing will be sending the Arduino a signal for the other components.
Download this text file and modify it for your needs.
Getting the code onto the Arduino
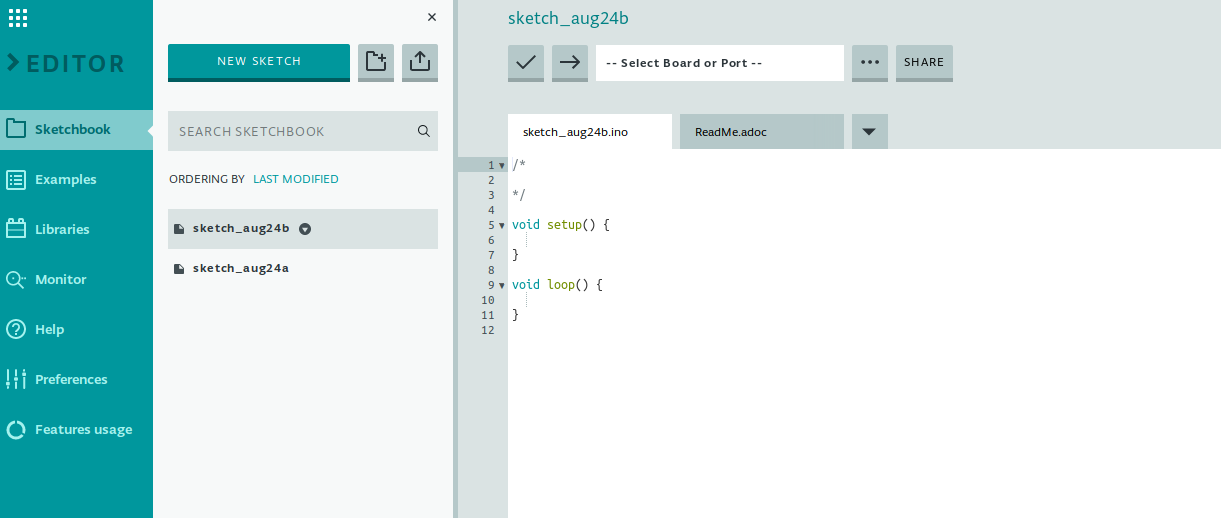
The Arduino folks have created an easy to use web editor. Once you have created an account, you can log in and use the Arduino Web Editor to send your code to your Arduino. Go to create.arduino.cc
Once in the Arduino Web Editor
- Create a new sketch (their name for projects) and copy in the controller code we provided above
- Be sure your Arduino is plugged in via USB
- Click on the "-- Select Board of Port --" menu at the top and find "Arduino Leonardo" (this works for both Pro Micro and Leonardo)
- Click the right-facing arrow next to the "-- Select Board of Port --" menu at the top to send your code to the Arduino
The moment of truth
You should be able to open a text editor on your computer and when you press the button it will type a lowercase 'a' each time. The way the code is designed, pressing and holding the button down should only type a single letter 'a'.
By default this code will only work if you are using an Arduino Pro Micro, and pins 9 and 8 for the buttons, and 10, 16, 15, and 14 for the joystick. The two buttons will emulate the keyboard keys "A" and "B", and the joystick will emulate the four arrow keys.
Here is a handy reference to all the Arduino key codes so you can change the code to whatever keyboard keys you need for your project Arduino Key Codes Reference
Ground wires
Ground wires for all buttons and the joystick can be shared, but we need to think of the joystick as 4 more buttons.
- To start the chain of ground wires, first use three wires to connect the four buttons on the bottom of the joystick to each other.
- Next, add an additional ground wire to connect one of the ground posts on the bottom of the joystick to a ground post on one of the buttons.
- Next, add another ground wire connecting the ground posts on both buttons together.
- Lastly, with another ground wire, connect the ground post on one of the two buttons to the GND pin on the Arduino.
Wiring everything up!
Now that you know how to wire up one button fully, and you understand that the ground wires should be shared, you can wire up the other button and the 4 switches on the joystick the same way. Reference the chart below for which buttons go to which pins, or be sure to note which pins you used in order to make changes in the code accordingly.
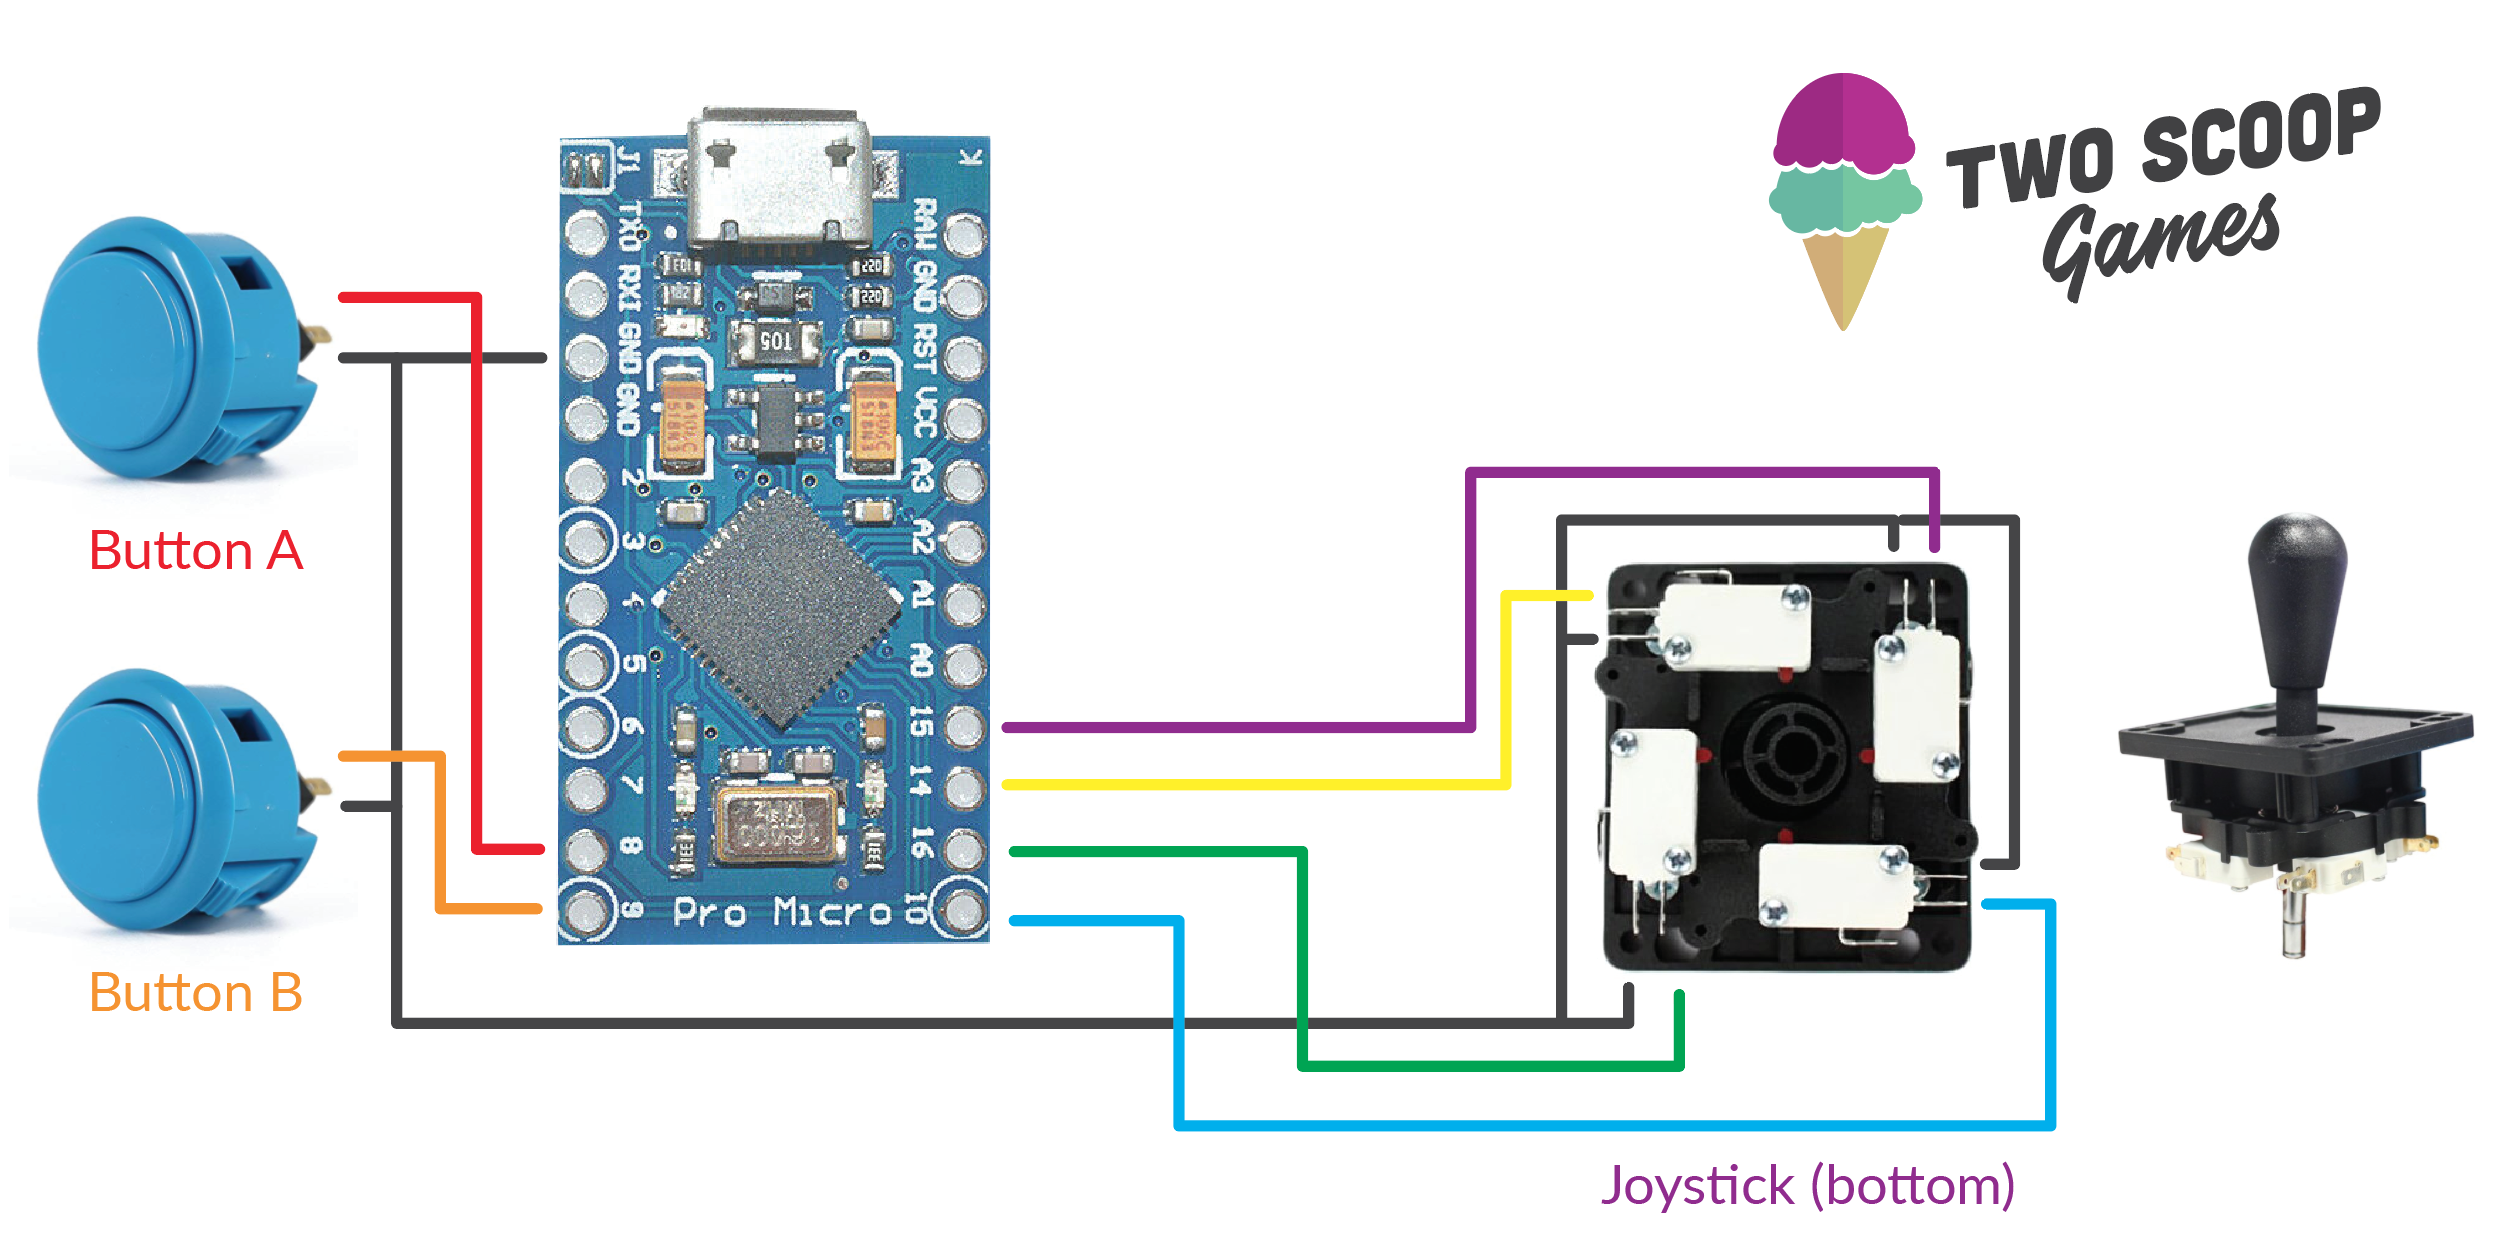
Which wires go where
- Arduino pin 8 – Arcade Button A
- Arduino pin 9 – Arcade Button B
- Arduino pin 10 – Joystick Up
- Arduino pin 16 – Joystick Down
- Arduino pin 15 – Joystick Left
- Arduino pin 14 – Joystick Right
Testing
This is it, you have everything wired up! Test it out in a text editor and make sure all of the buttons and joystick directions are emulating the appropriate keyboard keys.
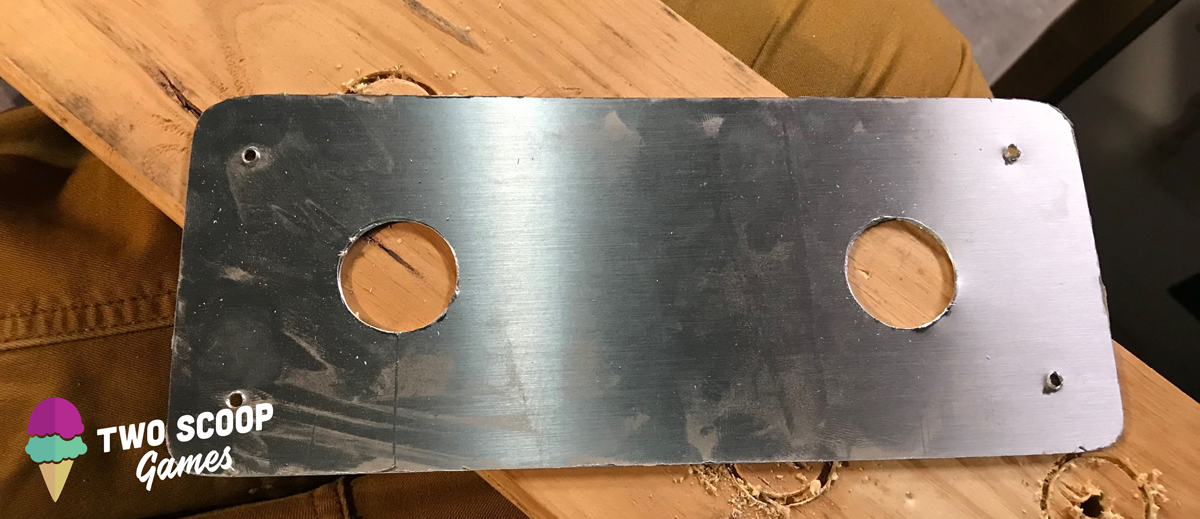
The case
You will want to put your arcade controller in some sort of housing. For our Kick Bot controller, we hollowed out a block of solid wood with a router and made a top out of some decorative acrylic/metal sheeting that a trophy shop was throwing out. Woodworking goes beyond the scope of this tutorial but there are much simpler ways of creating the housing for your controller.
- Project boxes – these come in both plastic and metal
- Cardboard boxes – you probably have access to some Amazon boxes, or any other thick cardboard box, these are fantastic for prototyping!
alt.ctrl community
alt.ctrl is a term used by GDC, the Game Developers Conference for a category of games that use alternative controller hardware to play them. This is a fantastic bunch of people making some of the coolest, strangest, most creative stuff in games right now. You can check out some friends of ours who create alt.ctrl games here:
- Amanda Hudgins (amandathrows.rocks / buttonsare.cool)
- Matt Hudgins (onlyslightly.com)
- r25th (r25th.com)
- mildmojo (mildmojo.com / discjockeyjockey.com)
Questions or issues
If you have any issues with anything in this project – typos, code errors etc. – feel free to let us know, we want to help! Email Alex: alex@twoscoopgames.com.
Thanks!
Shout outs
- mildmojo for answering our questions and helping fact-check. Check out his work and follow him on twitter @mildmojo
mildmojo.com
discjockeyjockey.com

If you haven't heard already Kick Bot is coming to Steam – but we need your help! We need you and everyone you know to add Kick Bot to their wishlists. In addition to letting you know when the game comes out, getting a huge number of wishlists will help us let Steam know that people want Kick Bot, which makes them more likely to feature Kick Bot. That's the kind of promotion we need to be able to continue making games. With so many games coming out – your wishlist is your vote. Help us show that Kick Bot is a game you want to play – go to wishlist.kickbotgame.com and click "add to your wishlist."
Thanks